How to Change the Batteries in a RJB Demo Unit : A Step-by-Step Guide
While the RJB system is known for its cutting-edge surgical angle measurement technology, you might encounter a situation where you need to change the batteries in your Demo unit. Don’t worry; we’ve got you covered. In this step-by-step guide, we’ll walk you through the process of safely changing the batteries in your RJB Demo unit.
About the RJB
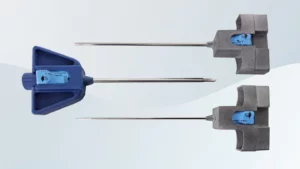
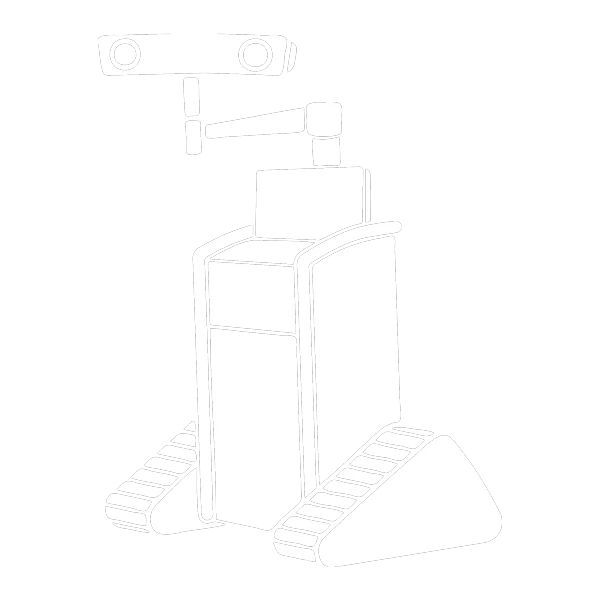
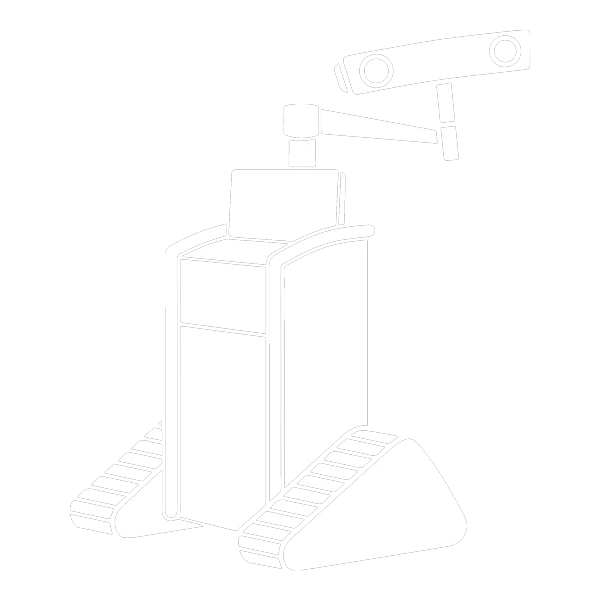
Before we dive into the battery replacement process, let’s take a quick look at what makes the Ruthless Spine RJB system special. The RJB is an innovative intraoperative surgical angle measurement tool designed for simplicity and efficiency. It consists of a small Bluetooth-connected module that attaches to the RJB surgical instrumentation. This module pairs with an Android or iOS tablet app, providing precise visualization of the instrument shaft’s axial and sagittal trajectory. The RJB’s ability to maintain connectivity even when the line of sight is blocked sets it apart, ensuring reliable measurements throughout your lumbosacral pedicle screw procedures.
For the full instructions on using the RJB, refer to our ‘RJB User Guide’.
Changing Batteries in the RJB Demo Unit
Note that battery replacement in RJB production units is not allowed. However, in Demo units, we’ve made it possible for you to change the batteries. Just follow these steps carefully to ensure you don’t damage your valuable RJB Demo unit.
Tools and Materials Needed
- Pair of scissors
- Toothpick
- RJB Demo unit
- Extra battery provided by Ruthless Spine
Step 1: Prepare Your Tools
Gather all the necessary tools and materials: a pair of scissors, a toothpick, your RJB Demo unit, and the extra battery sent to you by Ruthless Spine.
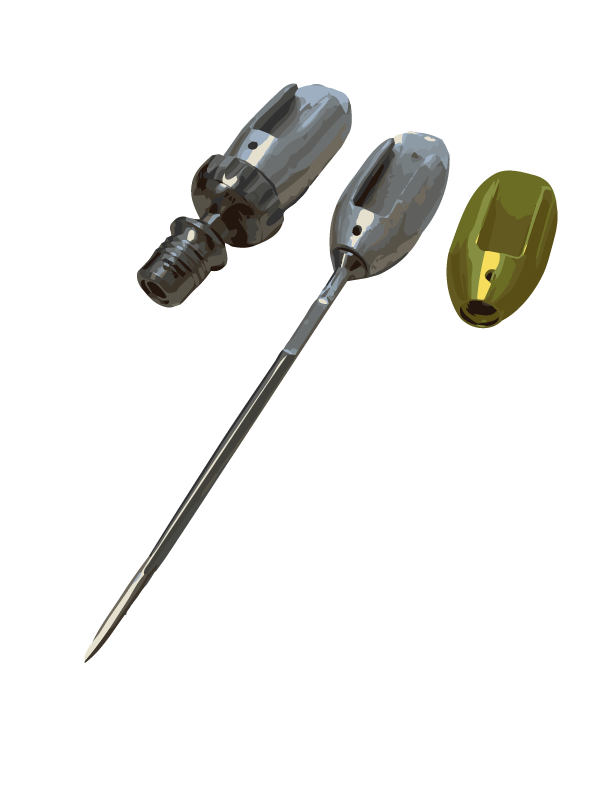
Step 2: Cut the Heat Shrink
Take your scissors and gently cut both sides of the heat shrink on the outside of the battery well. This should create a foldable access portal to the battery case. Be cautious not to cut too deeply or damage the unit’s components.
Step 3: Remove the Transparent Sliding Tab
Once you’ve cut the heat shrink, you’ll have access to the battery well. Locate the orange transparent sliding tab within the battery well and gently remove it. This tab secures the old battery in place. Once you remove it, the old battery should pop out as well.
Step 4: Verify Functionality
With the heat shrink folded back and the old battery removed, insert the new battery. Make sure to orient the new battery with the big flat side facing up. When you insert the battery correctly, you should notice two lights on the RJB unit: a red light for power and a blue light for Bluetooth connectivity.
Step 5: Remove the new battery
Now that we know that it is working, Take a nonmetallic toothpick, insert it into the open backside of the battery case and push out the new battery.
Step 6: Re-insert the Sliding Tab and the New Battery
Now that the battery is incapacitated, place the orange sliding tab back into the RJB and re-insert the new battery. No flashing lights indicate that you have properly changed it.
And there you have it! You’ve successfully changed the batteries in your RJB Demo unit. Remember, this procedure is intended only for Demo units, as battery replacement is not allowed in production units. If you encounter any issues or have questions about your RJB system, don’t hesitate to contact Ruthless Spine’s support team for assistance.
The Ruthless Spine RJB system continues to revolutionize lumbosacral pedicle screw procedures with its simplicity and reliability. By following this battery replacement guide, you can keep your Demo unit running smoothly and continue to benefit from the precision and convenience it offers.