This guide provides a general overview of the steps for using the Ruthless Spine RJB System. For comprehensive details, including the full device description, indications for use, limitations, warnings, cleaning and sterilization instructions, storage and handling requirements, label symbols, and system component identification, please refer to the complete RJB Information for Use page.
Table of Contents
ToggleRJB System Overview
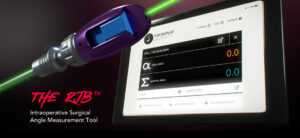
The RJB system by Ruthless Spine is an Intraoperative Surgical Angle Measurement tool targeted for improving ease, efficiency and cost-effectiveness in procedures for lumbosacral pedicle screw placements.
Ruthless Spine’s system provides measurements for angles in two planes relative to the vertical gravitational plumb line. The RJB device does not provide surgical assistance, guidance, or navigation against patient anatomy. As such, The RJB device is not intended to replace a surgeon’s clinical judgment. Click here to learn more about the RJB.
Step 1: Pre-Operative Planning
Obtain an Android or iPad Tablet
Minimum Tablet Requirements for the RJB System:
Apple
iPad Pro 11” (4th Generation) and above
Storage: 128GB
iOS: 14 and above
Camera: Camera access is desirable but not required (device barcode may be input manually)
Bluetooth: 4.0 and above
Wi-Fi: Is required to download the app but is not necessary for App usage Cellular
connectivity: Not required
Android
Storage: 32GB
Android OS: 10 and above
Processor Specifications: 2.0 GHz
Memory: 2GB RAM
Camera: Camera access is desirable but not required (device barcode may be input manually).
If camera function is utilized, minimum camera resolution is an 8MP main camera with
Bluetooth: 4.0 and above
Wi-Fi: Is required to download the app but is not necessary for App usage Cellular
connectivity: Not required
Obtain the RJB System
Reach out to us to acquire the RJB System if you aren’t already equipped.
Template Vertebral Bodies
This step is a general recommendation for pre-operative planning in lumbosacral pedicle screw procedures and is not specific to RJB use.
Use MRI or CT scans to template every vertebral body before surgery.
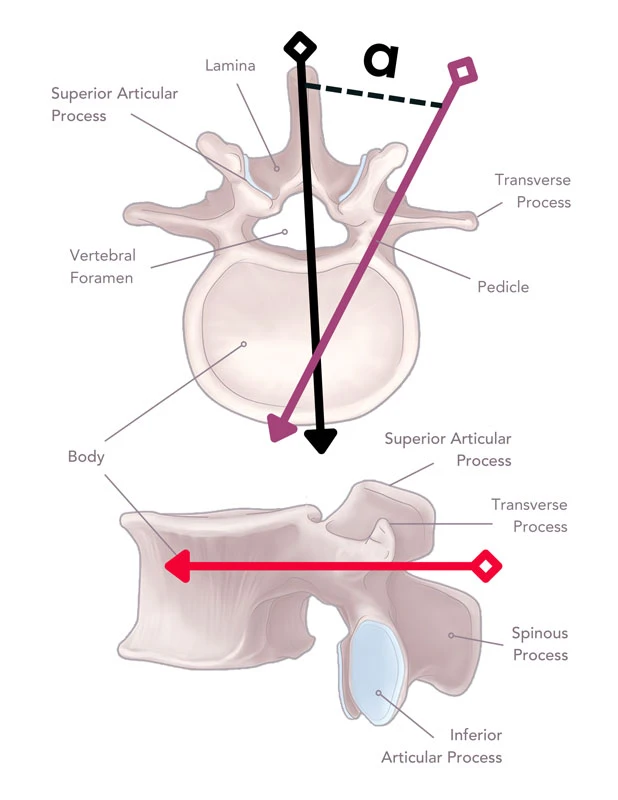
Basic Pedicle Screw Planning
- Obtain the axial view of the target vertebral body using the CT/MRI.
- Draw a line from the spinous process to the anterior vertebral body, bisecting the spine (Black Line).
- Draw another line from the base of the lateral superior articular facet through the thickest part of the pedicle (Purple Line).
- Calculate the axial angle (α) formed by these two lines. You may use the same angle for both the left and right sides or measure each individually.
- If your PACS system does not support angle measurement, consider using the free “Smart Protractor” app by Smart Tools.
- Record the axial angle for each screw along with the corresponding vertebral body level and bring this information to the OR. The app does not store any patient-specific data.
“Smart Protractor” app Guide
This step is a general recommendation for pre-operative planning in lumbosacral pedicle screw procedures and is not specific to RJB use.
Step 2: Set Up the RJB
Tablet and App Installation Instructions
Do not download or install any applications or programs on the tablet apart from the RJB App and security-based tablet software. A Wi-Fi connection is not required for RJB App usage but must be enabled for app installation and updating. Install all tablet operating system updates prior to App use using only known safe and secure networks outside of the hospital. App updates should only be performed when the user is directed to update the app. The user will be informed directly by Ruthless Spine of the need for an update and does not need to rely on Apple or Google Play store update notifications. Do not enable Wi-Fi or connect the tablet to any network during App use. Turn off all other Bluetooth devices in the operating room (use environment) during RJB pairing with the tablet. Do not allow the tablet to be plugged into any external USB computers, networks, or other peripherals during App use. Only factory delivered charging cables and adapters should be used.
a. Download the RJB App
Apple: Download the RJB App from the iTunes store.
Android: Download the RJB App from a one-way download link provided directly to the user using a known safe and secure Wi-Fi network outside of the hospital.
b. Turn on Do Not Disturb Mode on tablet.
Apple: Go to Settings -> Do Not Disturb and turn it ON. The options should be as follows: Scheduled is OFF, Silence is “Always”, Phone is “Allow Calls From No One”, Repeated Calls is OFF.
Android: Go to Settings -> Notifications -> Do Not Disturb and turn it ON. The options should be as follows: Turn On as Scheduled is OFF, Duration is “Until I Turn it Off”, Hide Notifications -> Hide All is ON, Allow exceptions -> Calls From is “None”, Repeat Callers is OFF, Messages From is “None”, Alarms is OFF, Media Sound is ON, Touch Sounds is ON, Calendar Events is OFF, Reminders is OFF.
c. Turn off Wi-Fi on tablet.
Apple: Go to Settings -> Wi-Fi, Wi-Fi is OFF.
Android: Go to Settings -> Connections, Wi-Fi is OFF.
Step 3: Operating the RJB
- Turn on the RJB device by removing and discarding the battery pull tab.
- Insert the RJB device into the handle slot. Follow the markings for device orientation. The slot should only allow the device to be inserted in one way.
- Deploy the Ruthless RJB app on a tablet.
- When the app is opened, a tablet screen prompts to pair the RJB device. The RJB identifier can be scanned from the label or manually inputted.
- After pairing the device, a prompt will appear to select the instrument type.
- Once the instrument type is selected, the starting screen will appear. From here, the user can see the angle of the device, hold the angle, offset the angle, edit the instrument name, choose display precision, and watch tutorial videos. Hold and offset features are controlled via touchscreen buttons in the tablet app.
- For use, the instrument should be oriented such that the face of the RJB (marked with ‘UP’ and ‘DOWN’ and visible through the front of the handle slot) is in a plane parallel with the plane of the operating table, without introducing rotation about the instrument shaft. During use, the instrument may be tilted in the axial and sagittal planes simultaneously but should not be rotated about its own shaft. Use the marked face of the RJB to reference the position of the instrument throughout the procedure.
- When using the RJB, it is recommended that the surgeon follow standard fluoroscopy-guided technique, utilizing fluoroscopy as necessary to confirm pedicle screw trajectory intraoperatively. The RJB is a spatial tool and not a navigation system providing trajectory guidance.
- If Bluetooth connection is lost (displayed angles disappear or freeze), restart app. If RJB device does not pair, turn on, or app does not restart, discard the device by disposing in accordance with facility protocol. Revert to standard fluoroscopy-guided technique to complete the procedure.
- To terminate operation of the device, close the RJB app. Remove RJB from the instrument handle and dispose in accordance with facility protocol.
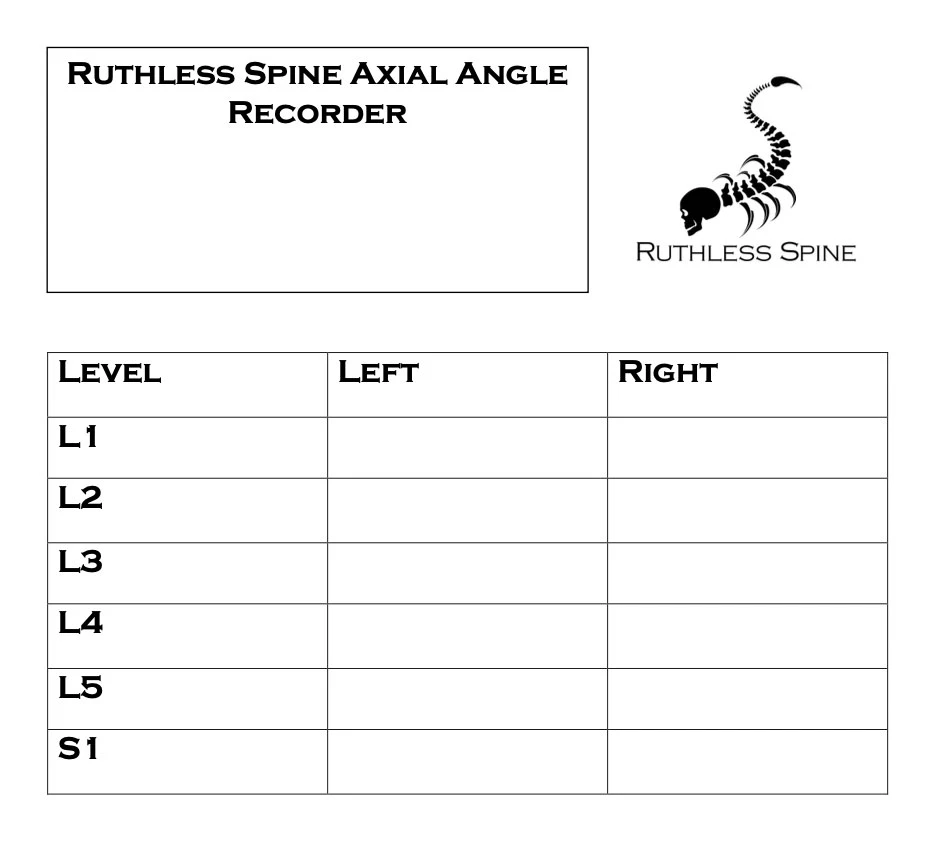
Record Axial Angles
The use of our Axial Angle Recorder is a general recommendation for the pedicle screw procedure, but is not required or mandatory for RJB operation.
- Record the axial angle at each level using the original angulation of the sacrum from the MRI. Add or subtract that correction for every level as needed.
- Document angles for each level and bring them to the OR.
- Feel free to use our Axial Angle Recorder Sheet below as an aid.
Step 4: Dispose of the RJB
Dispose of the RJB. The RJB is single use disposable only with a battery life rated as a maximum of 8 hours. It cannot be re-sterilized.
Troubleshooting & Support
If you encounter any issues or have questions, please reach out for assistance. We are here to help ensure your experience with the RJB system is smooth and efficient. Contact us for troubleshooting support or inquiries.
Feel free to utilize our resources, including instructional videos and downloadable sheets, to enhance your understanding and use of the RJB system effectively.


